Tutorial: Admin Configuration
This is Part 1 of the tutorial series. The series walks through the Keyserver on your trial environment. This part configures a signing key hierarchy, a role, and an authorized client. Part 2: Sign Code Using the Trial Environment signs and verifies a binary, and Part 3: Issue a Device Certificate issues a device certificate from a CSR. Each part runs on its own; Part 1 is recommended first, not required. New to the trial? Trial Environment covers the three hostnames, the seeded identities and keys, and how to switch identity in the browser.
In this tutorial you create an administrative session, a ROOT and FW key pair, and a role, then authorize the seeded CI/CD client to use it. You finish with a working signing setup ready for pipeline integration.
Internal Authserver for Testing Only
This tutorial uses the Keyserver's built-in internal Authserver for demonstration purposes. Do not use the internal Authserver in production. Production deployments must authenticate through an external OAuth2/OIDC provider such as Azure Entra ID or GitLab OIDC.
If this trial has been used before, some of the example names below may already exist. Read Cleanup and re-runs before you start Step 2.
Prerequisites
- Access to the Keyserver UI:
https://keyclient.<UNIQUE-ID>.cryptera-security.io - An administrative login:
adminuser - For Step 7, a terminal with
curlandjq(sudo apt install curl jqon Ubuntu,brew install curl jqon macOS)
Trial credentials
On a standard trial, adminuser and the seeded clients use the password password. Check your getting-started email if your trial was configured differently.
Step 1: Log in and start an administrative session
Administrative changes require an active, time-limited session. See Administrative Sessions.
1.1: Log in
Navigate to the Keyserver UI and sign in as adminuser. The authenticated user is shown in the badge in the top-right corner.
Navigation items appear only when your roles grant the matching permissions, so your bar may differ from the screenshots. For example, Approvals appears only for subjects with the approver Nature.
1.2: Create a session
- Click Admin in the navigation bar.
-
Enter a description that explains the purpose of the session, for example:
-
Click Create.
On the trial environment one authorizer is required, and adminuser self-authorizes immediately.
Production deployments may require more authorizers
The number of authorizers is defined by your deployment configuration. If your deployment requires more than one authorizer, the session stays pending until another administrator authorizes it. The Admin page shows the count as Authorizers ( N of required M):. See Administrative Sessions.
1.3: Confirm the session is active
Once active, a yellow Authorizers badge appears in the top-right corner of the navigation bar showing the remaining validity time. The Admin page now shows the active administration session, including its session details and authorizers.
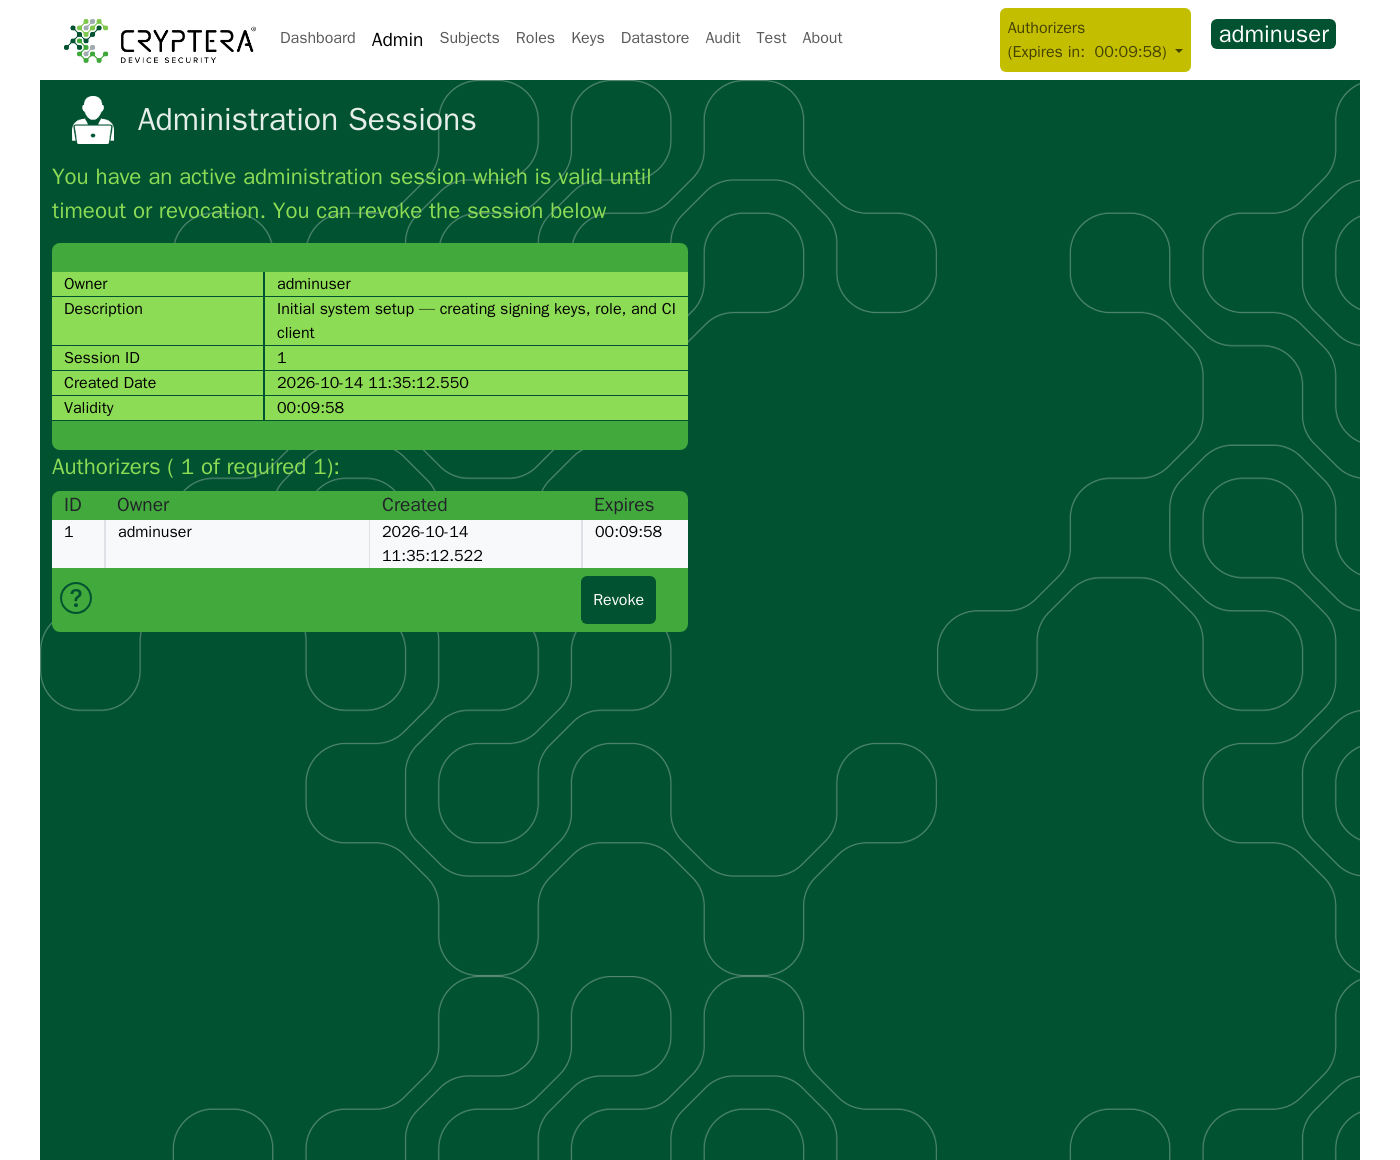
Do not proceed until the yellow badge is visible
On the trial environment this happens immediately.
The session expires when the Validity countdown on the Admin page reaches zero (the badge shows the same time as Expires in). After that, create a new session to make further changes.
Step 2: Create a ROOT key
The ROOT key is the trust anchor of your key hierarchy. It signs the certificates of the CA and FW keys below it.
2.1: Open the key creation form
- Click Keys in the navigation bar.
- Click Create (bottom of the page).
The Create Signingkey panel opens on the right side of the page.
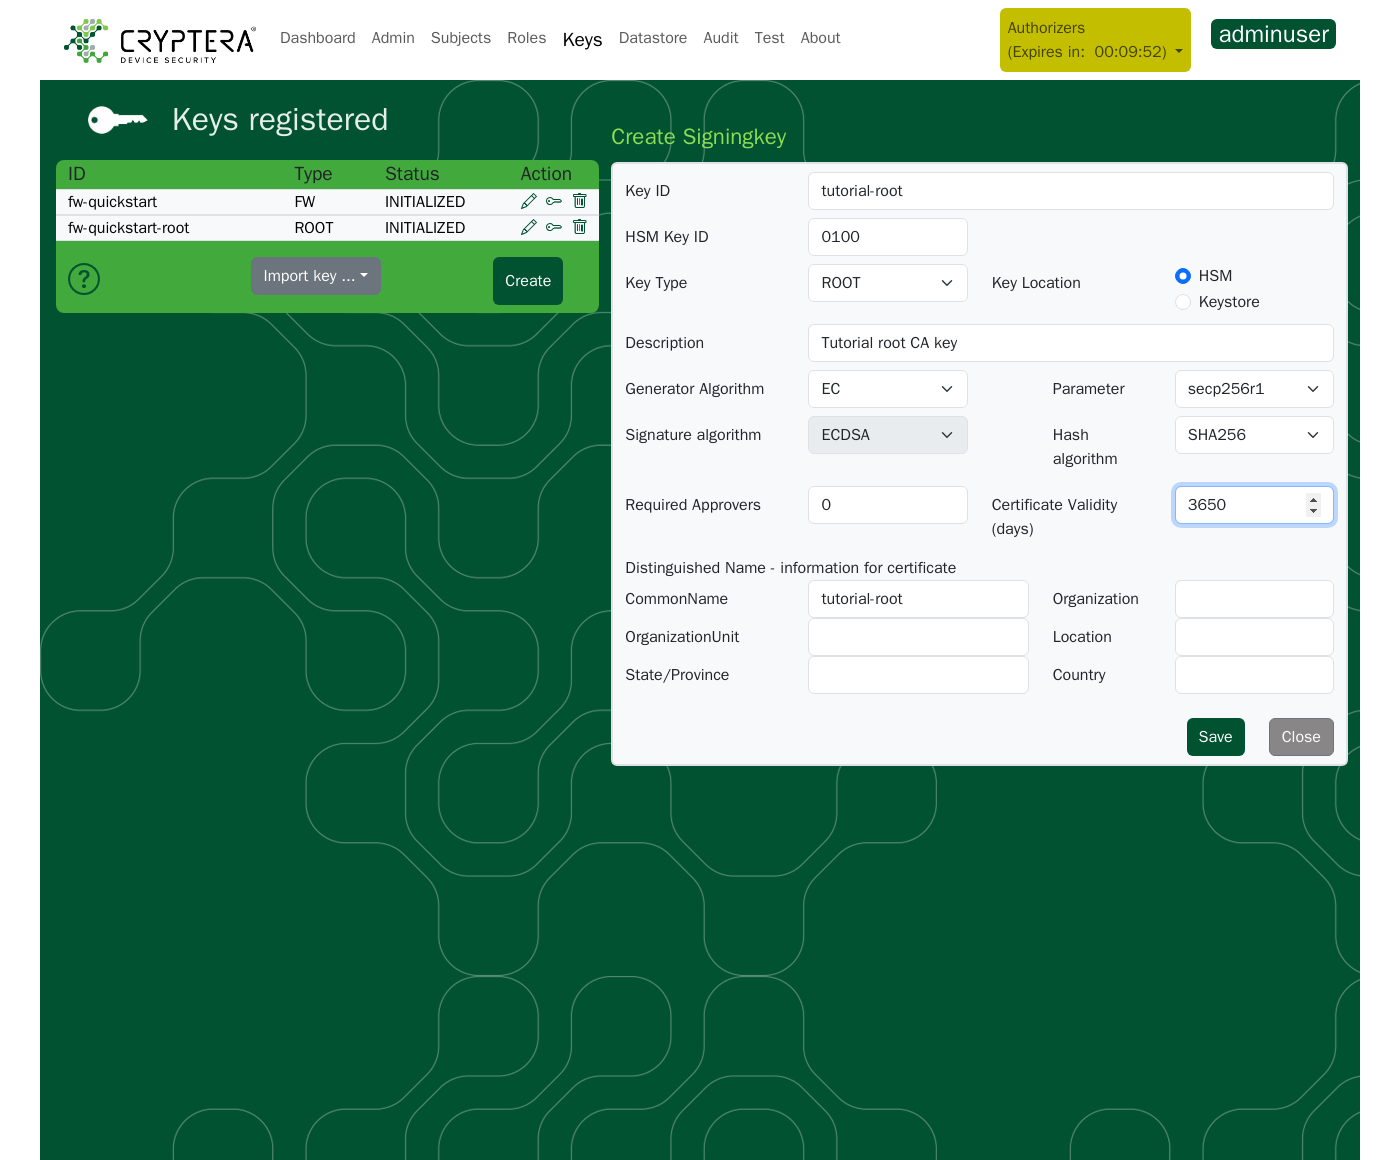
2.2: Fill in the ROOT key fields
| Field | Value | Notes |
|---|---|---|
| Key ID | tutorial-root | Unique identifier, used in the API |
| HSM Key ID | 0100 | An unused 4-digit hex number between 0100 and FFFE, without a 0x prefix |
| Key Type | ROOT | Select from the dropdown. The Root Key row is hidden: a ROOT key is self-signed |
| Key Location | HSM | Always select HSM (KEYSTORE is only for keys that must be exportable) |
| Description | Tutorial root CA key | Free text |
| Generator Algorithm | EC | |
| Parameter | secp256r1 | |
| Hash Algorithm | SHA256 | |
| Required Approvers | 0 | |
| Certificate Validity | 3650 |
Leave the Signature algorithm field and the Distinguished Name section at their defaults. The CommonName is filled in from the Key ID.
The filled-in form looks like this:
2.3: Save and wait for INITIALIZED
Click Save. The panel stays open and switches to Edit Signingkey: the values you entered become read-only, a Key Status field appears, and only Description and Required Approvers remain editable. The key appears in the list with status NEW, or already INITIALIZED if the HSM was quick. If it shows NEW, wait a few seconds and reload the page until it shows INITIALIZED.
| Status | Meaning |
|---|---|
NEW | Key record created, generation pending |
INITIALIZED | Key ready. You need this state before proceeding |
REJECTED | HSM refused the parameters. Check Key ID / HSM Key ID and retry |
RETRY | Temporarily unavailable: HSM connection issue |
Wait for INITIALIZED
Do not continue to Step 3 until tutorial-root shows INITIALIZED. Keys cannot be used or referenced until they reach this status.
Step 3: Create an FW signing key
The FW key is the key your CI/CD pipeline uses to sign firmware or binaries. The ROOT key you just created signs its certificate, forming a two-level trust chain.
3.1: Open the key creation form again
Click Create from the Keys list.
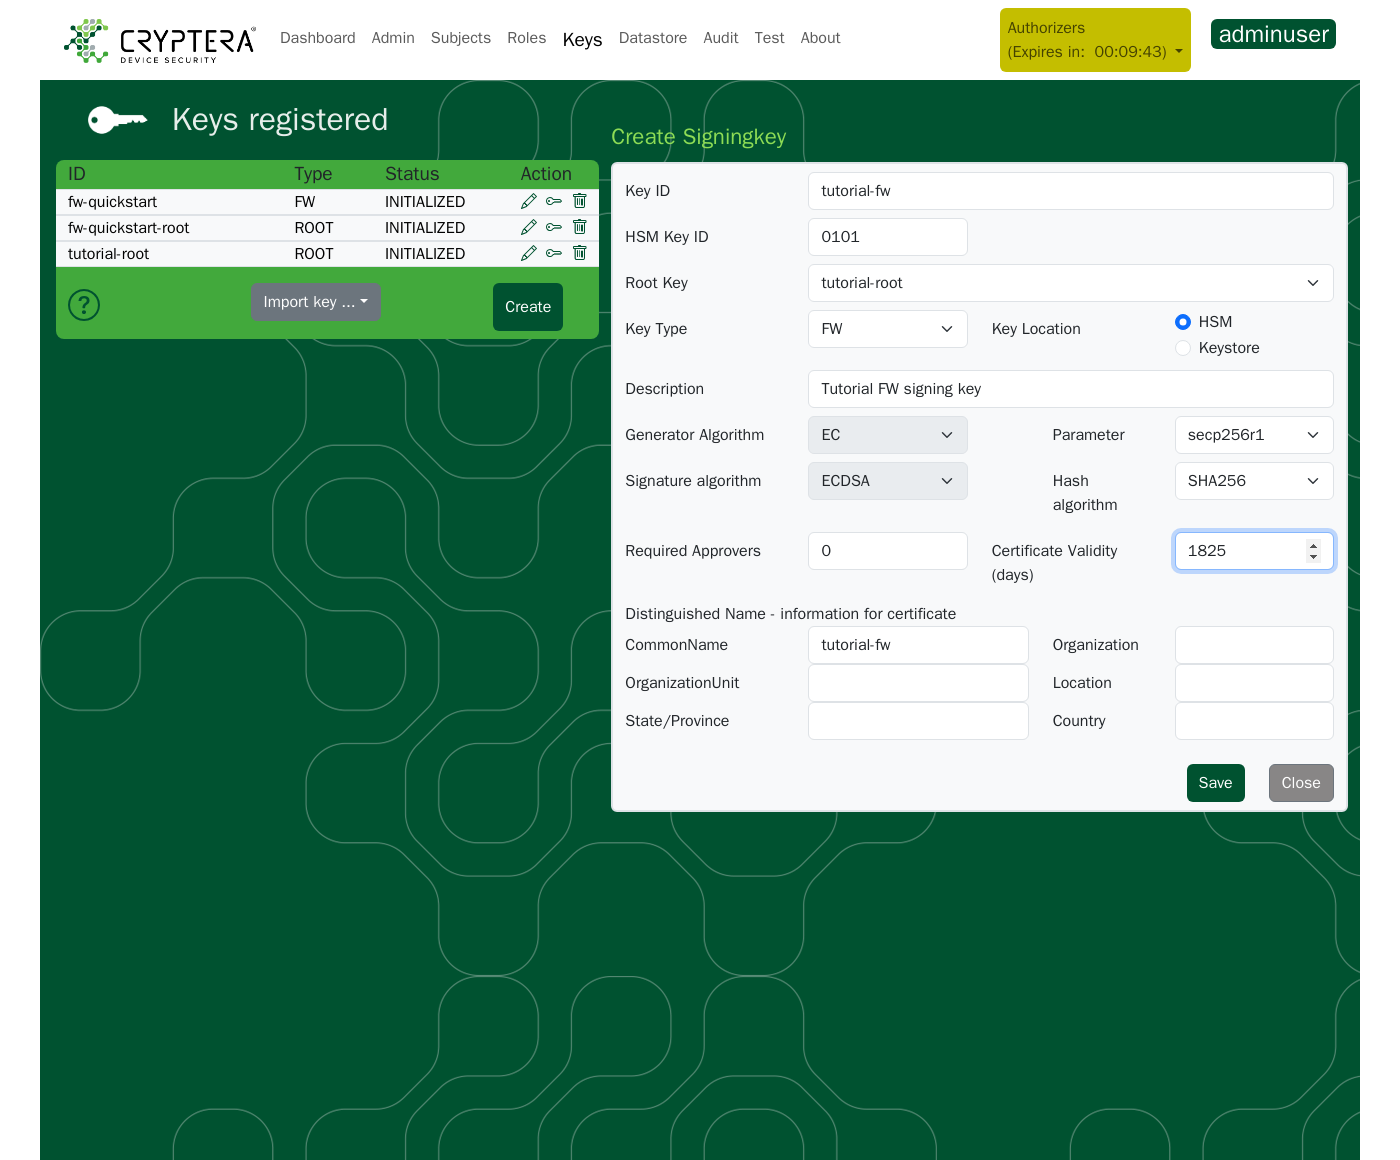
3.2: Fill in the FW key fields
| Field | Value | Notes |
|---|---|---|
| Key ID | tutorial-fw | |
| HSM Key ID | 0101 | Different 4-digit hex value from the ROOT key (0100–FFFE, no 0x prefix) |
| Key Type | FW | |
| Key Location | HSM | Same location as the ROOT key |
| Root Key | tutorial-root | Select from the dropdown: the key from Step 2 |
| Description | Tutorial FW signing key | |
| Required Approvers | 0 | No human approval required |
| Certificate Validity | 1825 |
When a Root Key is selected, the Generator Algorithm is locked to the root key's, because a key must use the same algorithm family as the root that signs its certificate. The Hash Algorithm is not inherited and must be set explicitly. Selecting the root also resets Parameter to its default. Check that it still shows secp256r1 and re-select it if not.
The form with a FW key and Root Key selected looks like this:
3.3: Save and wait for INITIALIZED
Click Save. As in 2.3, the panel switches to Edit Signingkey and Key Status shows NEW. Reload the page and wait for tutorial-fw to show INITIALIZED in the list before continuing.
Step 4: Create a role for the CI/CD orderer
A role is a named set of permissions. Your CI/CD pipeline needs a role that lets it create signing operations and place signing orders with tutorial-fw.
4.1: Navigate to Roles
Click Roles in the navigation bar.
4.2: Create a new role
Click Create. The role creation panel opens.
Fill in the header fields:
| Field | Value |
|---|---|
| Name | ci-orderer-tutorial |
| Description | CI/CD pipeline — signs with tutorial-fw |
4.3: Add permissions using Natures
We recommend using Natures when assigning permissions. They provide the intended minimal permission set for each role type and help reduce the risk of under- or over-granting access. Individual permissions can still be added manually when needed. See Nature reference.
In the permissions section:
- Expand Signing Key Permissions ..., then click Add natures to role ...
- In the Nature dropdown, select fwsigner ("Can act as CI/CD client for FW signing for specified keys")
- A list of key checkboxes appears. Tick
tutorial-fw. - Click Add, the button to the right of the Nature dropdown (not the Add under the permission table, which adds a single permission).
The natures panel with fwsigner selected and a key ticked looks like this:
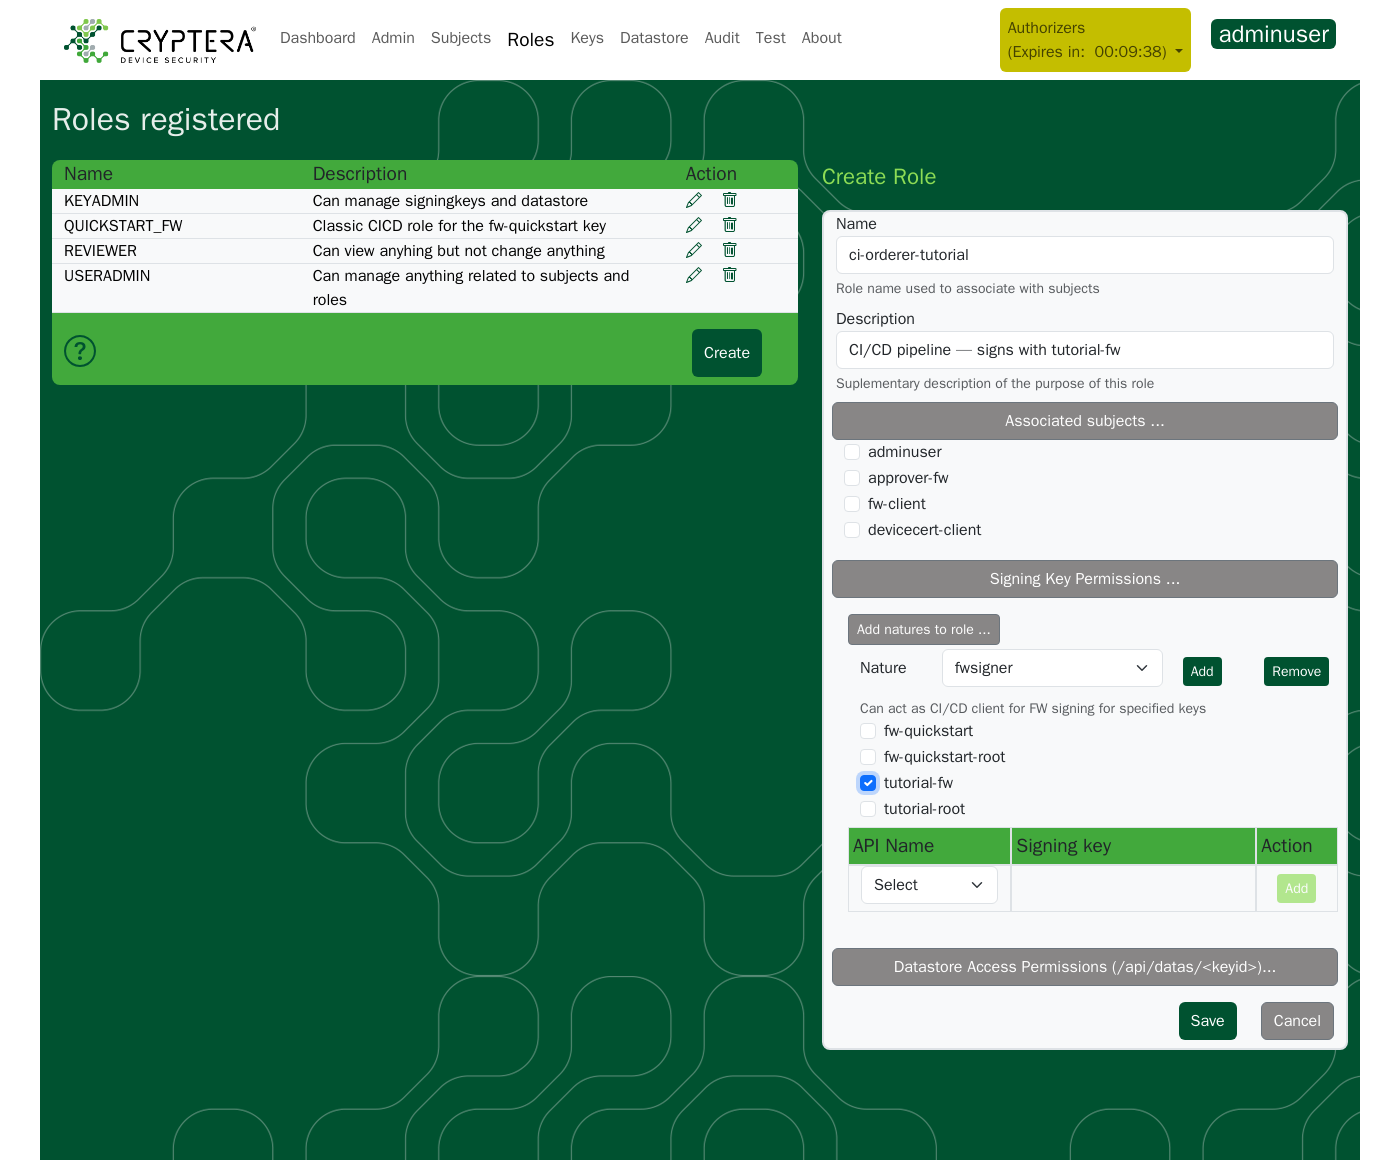
The fwsigner nature adds the permissions a CI/CD pipeline needs to create and submit signing operations with that key: createoperation, order, getoperation, canceloperation, getallkeys, getkeys, getdata, and getprivkeys, all scoped to tutorial-fw. They appear in the permission list below the natures panel. On an HSM key such as tutorial-fw, getprivkeys has no effect.
4.4: Save the role
Click Save. The role ci-orderer-tutorial now appears in the roles list.
Step 5: Authorize the seeded CI/CD client
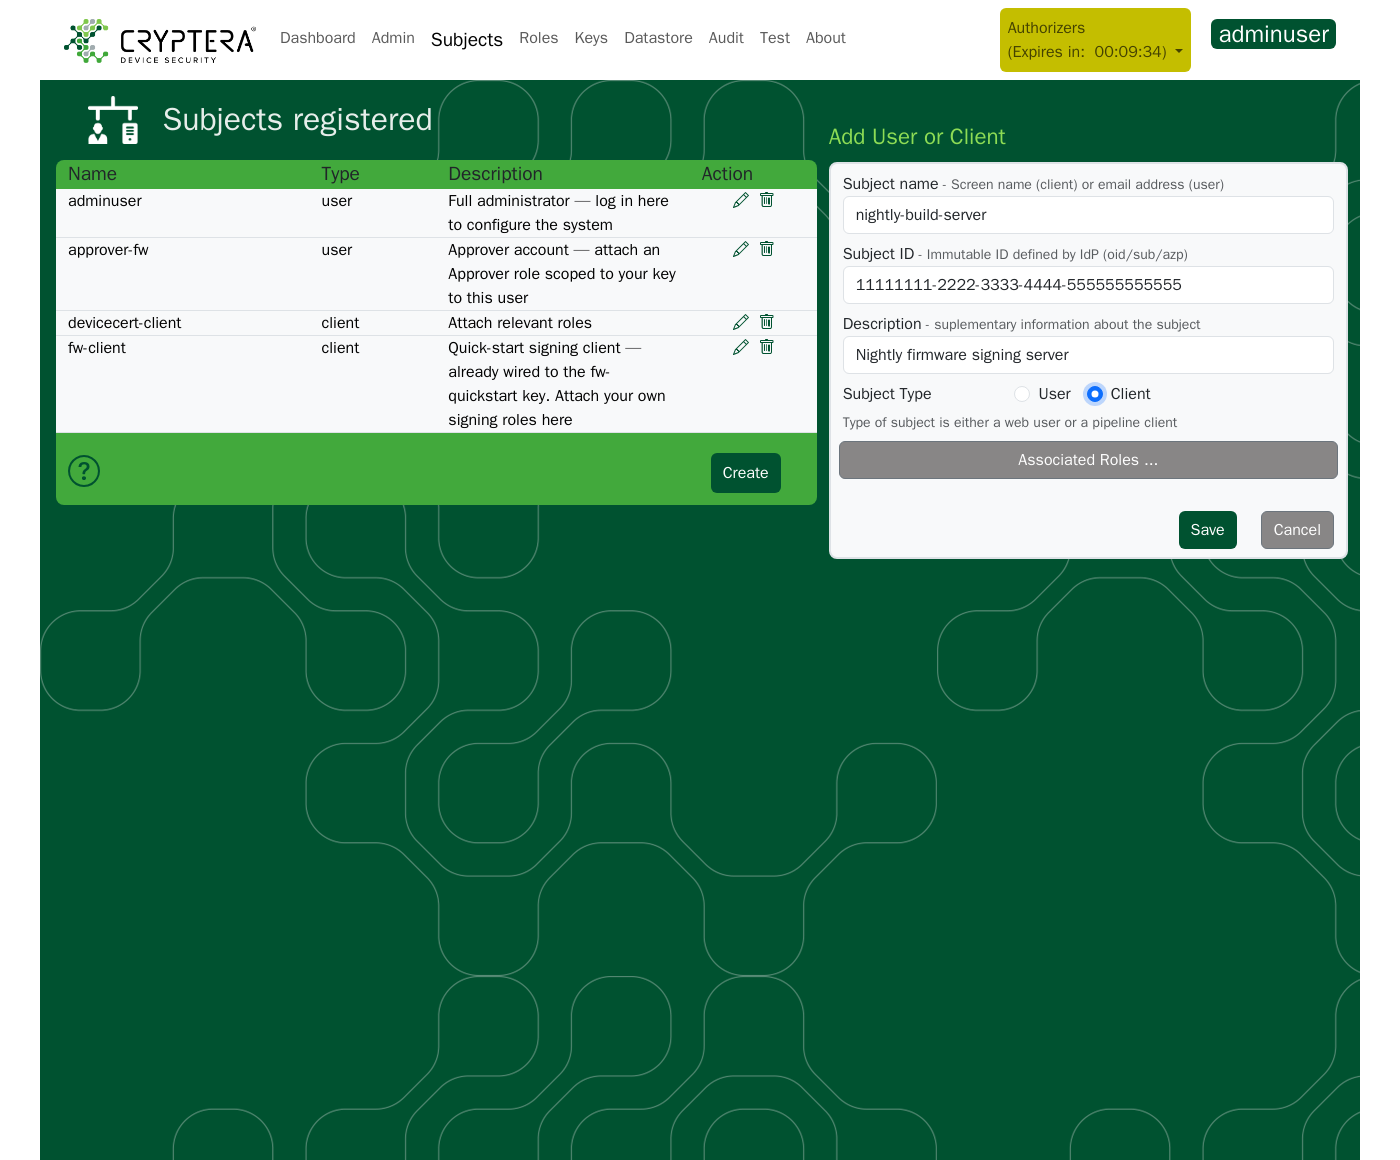
A subject is the identity that authenticates to the Keyserver. For a CI/CD pipeline this is a client whose Subject ID matches an identity claim in the token it gets with its client_id. See Token-to-subject mapping. Your trial already has this subject, fw-client. You attach the new role to it.
5.1: Navigate to Subjects
Click Subjects in the navigation bar.
5.2: Open the subject
Click the edit (pencil) icon in the fw-client row. The subject is pre-registered together with its credentials in the internal Authserver, and creating a second subject with the same name is rejected with "Subjectname already exists".
Why not create a new subject? A subject is the Keyserver-side record of an identity that already exists in the authorization server. Creating one does not create login credentials. The internal Authserver of the trial environment has no registration facility, so a newly created subject could never authenticate. In production, first register the client or user with your identity provider (Azure Entra ID, GitLab; see the authentication how-tos), then create the matching subject in the Keyserver. Its Subject ID must match the identity value from the token claim configured for that provider; the Subject name is a human-readable label. See Manage Subjects.
5.3: Assign the role
In the Associated Roles section, check the box next to ci-orderer-tutorial. Leave any roles that are already ticked as they are.
5.4: Save
Click Save. The subject fw-client in the subjects list now carries the ci-orderer-tutorial role and is ready to authenticate.
Step 6: Close the administrative session
Revoke the session when you finish rather than letting it expire.
- Click Admin in the navigation bar.
- Click Revoke.
The yellow badge disappears from the navigation bar. Administrative changes are no longer possible until a new session is created.
Step 7: Verify the setup
Confirm that fw-client can authenticate and create a signing operation with tutorial-fw:
export KEYSERVER="https://keyserver.<UNIQUE-ID>.cryptera-security.io"
export AUTHSERVER="https://authserver.<UNIQUE-ID>.cryptera-security.io/oauth2/token"

# 1. Get a token as fw-client
export CLIENT_ID=fw-client
export CLIENT_SECRET=password
export AUTH_CREDS=$(printf '%s' "$CLIENT_ID:$CLIENT_SECRET" | base64 | tr -d '\n')

export TOKEN=$(
  curl -sS --tlsv1.3 -X POST \
    -H "Authorization: Basic $AUTH_CREDS" \
    -d "grant_type=client_credentials" \
    "$AUTHSERVER" | jq -r .access_token
)
[ -n "$TOKEN" ] && [ "$TOKEN" != null ] && echo "Token received"

# 2. Create a signing operation for tutorial-fw
export OP=$(
  curl -sS --tlsv1.3 -X POST "$KEYSERVER/api/operations" \
    -H "Authorization: Bearer $TOKEN" \
    -H "Content-Type: application/json" \
    -d '{
          "validms": 60000,
          "description": "Tutorial verification",
          "new-keyusagerestrictions": [{"keyid": "tutorial-fw", "maxusagecount": 1}]
        }' | jq -r .id
)
echo "Operation ID: $OP"
Expected output, ending in an operation UUID:
A UUID means fw-client was authenticated, authorized, and created an operation using tutorial-fw.
If it prints Operation ID: null, re-run the two curl commands with --fail-with-body added and without the | jq part to see the error, then use the table below.
If something fails
| Symptom | Cause and fix |
|---|---|
| Yellow Authorizers badge never appears (Step 1) | The session has not reached the required authorizer count. If your deployment requires more than one authorizer, another administrator must authorize it |
| Yellow badge disappeared mid-tutorial | The admin session expired. Changes already saved persist. Create a new session (1.2) and continue where you left off |
| Save appears to do nothing, or the form reports errors | The form submits incomplete input and the server rejects it. Read the red error text under the form: it names the field and the rule (for example hsmkeyid: must be a 4 digit hex number between 0100 and FFFE; no 0x prefix) |
409 "A signingkey with this keyid already exists" (or hsmkeyid) | The name or HSM Key ID is taken. See Cleanup and re-runs |
Key shows REJECTED | The HSM refused the parameters. Edit the key, check HSM Key ID (unused 4-digit hex, 0100–FFFE) and the algorithm/parameter combination, and save again |
Key stuck in NEW/RETRY | HSM connectivity issue. Wait and refresh; if it persists, contact your Keyserver operator |
Verification: no Token received line | Wrong credentials or AUTHSERVER URL |
Verification: 401 "The user/client is not valid" | The Subject ID does not match the token's sub claim, an MD5 hash of the client_id on the trial. Copy the value from the token; do not retype it |
Verification: 403 "Access forbidden" | Role not attached to the subject, or the fwsigner nature is missing or not scoped to tutorial-fw |
Verification: 404 naming tutorial-fw | The key is not INITIALIZED yet, or the Key ID is misspelled |
Full status-code reference: Error Codes.
What you built
| Object | Name | Purpose |
|---|---|---|
| ROOT key | tutorial-root | Trust anchor; signs the FW key certificate |
| FW key | tutorial-fw | Signs firmware/binaries; used by the CI pipeline |
| Role | ci-orderer-tutorial | Grants fw-client permission to sign with tutorial-fw |
| Subject | fw-client | The CI/CD pipeline identity, seeded on your trial and authorized here by attaching the role |
Cleanup and re-runs
The tutorial uses fixed example names, so a second run, or a trial someone else has used, can hit names that already exist. Both the Key ID and the HSM Key ID must be unique, and a clash is rejected with 409 naming the field:
Change the field the message names and retry. The two fields are checked separately, so a second clash can follow the first.
- Signing keys are never deleted, and revoked keys still count toward uniqueness. Pick fresh values (for example
tutorial-root-2, HSM Key ID0104) and use them wherever the steps saytutorial-rootortutorial-fw. - Roles: re-creating
ci-orderer-tutorialafter deleting it gives you an empty role. Re-add its permissions and re-attach it to the subject. See Delete a subject. - Subjects are only edited here, never created, so they never clash.
If the objects from a previous run are still present and correct, skip to Step 5 and reuse them.
To undo this tutorial, open an administrative session, untick ci-orderer-tutorial on fw-client, and delete the role. Revoking tutorial-root and tutorial-fw is optional and cannot be undone (revoke tutorial-fw before tutorial-root; a ROOT key with non-revoked keys below it cannot be revoked). See Create and Manage Keys in the Keyserver. For a complete reset of the trial, ask Cryptera.
Next step
Your system is configured. Continue with Sign Code Using the Trial Environment (Part 2) for the complete signing workflow: hash a binary, create an operation, obtain approval, retrieve a signature, and verify it with OpenSSL.
Production setup recommendations
In production, the same objects are created against your own identity provider and key policy:
- Keys, approver counts and revocation: Manage Keys
- Roles built from Natures, and keeping orderer and approver roles apart: Manage Roles
- Subjects whose Subject ID matches your identity provider's token claim: Manage Subjects
- Approver roles and approving operations: Set Up and Run Approval Workflows
- Authorizer count and session policy: Administrative Sessions
- Connecting an identity provider: Azure Entra ID or GitLab CI